Coffeepot and Warmer

 
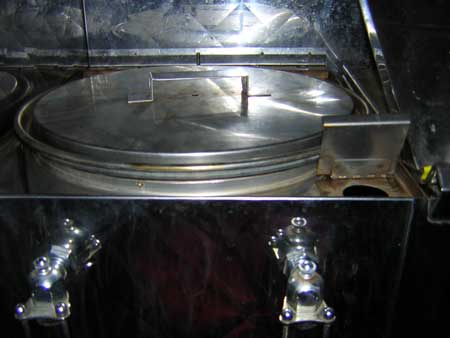
Rear of Unit The rear of the unit contains the coffeepot and warmer.

The coffeepot and the hot water jacket are filled by lifting the panel above the coffeepot.

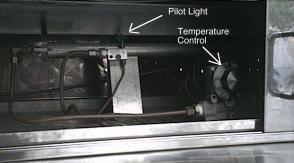
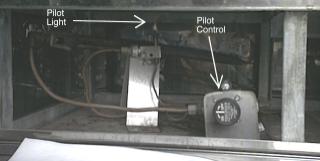
The pilot lights and controls are located behind the sliding panels below the coffeepot and warmer.  The coffeepot and the warmer have separate pilot lights and controls.


Filling the coffee pot


Coffee Fill
The top of the coffee pot is covered by a piece of removable sheet metal.  (not shown)

The large opening with the lid is where the coffee and water for coffee go.  The small opening on the right front is the water jacket for hot water.  Hot water is used for cocoa and soup.

It is always best to fill the coffee pot with hot water if possible, as it can take a long time to heat the water using the propane burner on the coffee pot.

Pilot Lights

 
Coffee Pot Pilot Light and
              Controls The Coffee Pot has a pilot light and controls as shown. To light the pilot light, rotate the knob to "pilot" (center position) and push in, then light the pilot light. Hold in for several seconds before releasing the knob, and check that the pilot light remains lit.

The goal is to serve the coffee at 160F.  To turn the burner on to warm the coffee and water, turn the knob counterclockwise.  To turn the burner off turn the knob clockwise until burner turns off.  Leave the pilot light on.  Since the coffeepot does not have a thermostat, the temperature is controlled manually.  A higher temperature is needed to brew coffee, but not for the freeze dried coffee.


Warmer Pilot Light The warmer has a pilot light and temperature control as shown. The pilot light control knob is not shown, it is to the right of the temperature control. The pilot light is lit just like the coffeepot pilot light. Adjust the temperature control for a holding temperature of 150 degrees F, for food safety.

Making coffee

Before filling the coffee pot and hot water jacket, check that the coffee pot is clean and free of mold.

Start with one pound of instant coffee per pot, and add more to taste if needed. Be sure to put in the water first, then the coffee.
 

Draining and cleaning the coffeepot

Before putting away the unit, drain out all the coffee and rinse out the pot.  Also drain the water out of the hot water jacket.

To prevent mold from growing in the coffeepot in storage, leave the lids off the pot and prop the cover open to allow it to completely dry.

Waste Tank


Drain Tank
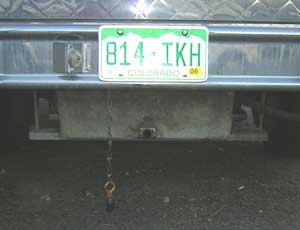
The spillage from melting ice and the filling the coffee cups goes into a waste tank under the rear bumper.  Drain the tank before setting up at a site, and then drain the tank again at the end of the event.  Sometimes you will need to drain the tank during an event; if you see water dripping from under the unit, it may be time to drain the waste tank.


Return to Table of Contents

RAF  11/1/05